Saturday, June 17, 2006

Landing Done


Appa & I got to work really early today. We trenched the landing area, put some landscape fabric, spread some sand and laid down patio stones to make a landing at the bottom of the deck stairs.

The final key piece is now in place for final inspection!

[Picture shows work in progress...]

Friday, June 16, 2006

Stair Risers and Rails Done!


Appa & I cut some 1x6s down to size, and nailed them to the stringer; making the stairs really solid!

We then did the stair rails. We used 4 ft railings after trimming them an inch or so. This was a bit complicated because of the railing slope, but after stumbling a bit, the task was successfully completed.

Thursday, June 15, 2006

Bottom Stair Rail Posts Done

Spent a warm, breezy evening with Appa, cutting channels into the last stair runner, and installing it. Also cut the bottom stair rail posts to size, ran wiring, installed post cover, skirt & light.

Next: risers, stair rails and landing; followed by final inspection by the municipality!

Pictures to be uploaded!

Sunday, June 11, 2006

Stair Runners Done


After a week or so of rain, the sun came out for a bit. Reddy and I installed the stair stringers and runners, as well as setting the stair rail posts into the ground.

Monday, May 29, 2006

Stair Rail Post Holes

After measuring and determining the locations of the stair rail posts, I dug two holes - each about 1'6" deep. Next up: build the stairs!

Friday, May 26, 2006

Railings Done!

Took the day off. Weather was cold and windy in the morning, so I went to Pandya's to get 4 boards for the stair runners. Also went to Lowe's and got boards for the stair risers, patio stones for the landing at the bottom of the stairs, and a roll of weed block.

When it got warmer, I installed the remaining two railings. The deck has a perimeter now, with an opening for the stairs (which is blocked by a child gate right now). Meanwhile, Manisha rolled out the weed block to mark the stairs & landing area.

With a grill and the patio table/chairs in place, the deck sported a completed look!

Thursday, May 25, 2006

Wiring Done


I secured the perimeter wiring all along the underside of the framing using staples (the types that are hammered in). I also connected the individual post light 'pigtails' to the perimeter wire to ensure that all lights were working.

Sunday, May 21, 2006

3 More Railings Installed! 2 left...

Reddy, Manisha & I installed 3 more railings. We followed the same procedure that we used for the first railing. However, an added task was to cut the vinyl portions of the top and bottom rails symmetrically (we used the mitre saw for this).
[Better pictures to be captured when the sun hits the deck directly]

Saturday, May 20, 2006

First Deck Railing Installed! 5 left...


Manisha & I installed the first railing as well as the wiring as follows:
  1. Cut a 12-gauge outdoor lighting wire to a length of about 4'6" (i.e. make a "pigtail")
  2. Thread the wire through a railing post cover, and insert cover with base cap over a railing post so the wire comes out 6" at either end
  3. Connect top end of wire to cap light, and place cap light on post
  4. Attach railing post cover to post using screws
  5. Repeat above steps for next post
  6. Cut top & bottom railings to size - both vinyl (sleeve) and metal (inside rail) parts of each
  7. Screw in center support into bottom rail
  8. Place bottom rail on 4x4 stock, and position between two posts. Screw in end caps into place
  9. Insert balusters into bottom rail slots
  10. Place top rail on balusters - align balusters with slots in top rail
  11. Press top rail into place, check level and screw in end caps into place.
  12. Connect post light pigtail to perimeter lighting wire.

Sunday, May 14, 2006

Railing Posts Installed


Using a SKIL jigsaw, Reddy and I made openings on the deck floors at appropriate locations . We then inserted 4x4s through the holes. We buried the post ends in the ground, and bolted their middles to the deck frame. We sawed them off using a circular saw/handsaw to a height of about 38".

Saturday, May 13, 2006

Deck Floor Boards Timmed


With Reddy's help, the deck floor boards were all trimmed to a straight line. We snapped a chalk line, and used a circular saw for the purpose.

Friday, May 12, 2006

Deck Flooring - Final


I put in the final two rows of the deck floor. I had waited this long to figure out how to get the railing posts through the floor to bolt on to the deck framing. Now the path was clear!

In order to prevent the last row from having a huge overhang, I had to add another 2x8 to the end of the framing (picture).

Saturday, November 19, 2005

Deck Flooring: Done! (Close to...)


On 11/18, Ajmal and I went to pandya's and hauled 13 more boards.

On 11/19, I trimmed and put them all in place except the 4 belonging to the last 2 rows. I need to put in my stair posts, so they will have to wait until next spring.

I then took a well earned break to watch Troy Smith do unspeakable things to the Wolverines like he did last year. Life is good!

PHASE 2 (DECK FLOORING) IS NOW COMPLETE!

Tuesday, November 15, 2005

Deck Flooring: 80%


Weather was looking good, so before we got the rain and snow as promised, I put in the rest of the boards that I had. Row count: 28 of 35.

I need 13 more boards! I will probably haul them on Nov 17, and finish up the decking over the weekend.

My daughter is really excited and she told me yesterday "Daddy, you do good deck work" :)


Sunday, November 13, 2005

Deck Flooring: 60%


More boards. Row count: 22 of 35. I now had a well-established process to do this. Some of the pieces had to be cut to size, so the going was slow despite the process :)

Saturday, November 12, 2005

Deck Flooring: 40%


I installed more deck boards. Row count = 14 of 35.

Friday, November 11, 2005

Deck Flooring: the first 25%

Uncle, Reddy and I figured out the dimensions of the boards we needed to cut for the deck floor. Pandya's material came in 10ft long pieces. It was more like 10' 2", but some needed to be trimmed to remove flashing, and other artefacts. I had planned on a staggered pattern comprised of:
  • Row 1: 10 ft + 10 ft
  • Row 2: 5ft + 10ft + 5 ft
Turned out the 5 ft pieces actually had to be more like 5' 1". As uncle and Reddy set about cutting them to size, I was placing them on the joists for a visual check.

Everything checked out. We then broke for lunch.

Fueled by Pizza, Reddy and I then started screwing the boards in place using a power drill/screwdriver ( a must have!). The boards did not require any pre-drilling since we were using 3" composite wood screws. We used simple paint sticks for controlling the spacing between the boards. We managed to put in about 6 rows. After Reddy left, I put in 3 more rows.

Decking was about 25% complete (9 of 35 rows)!

Remedial Measures


I started early on Veteran's Day, which was a holiday. I had decided to try to remove the side/angled nails from the joist hangers. I tried a couple of different tools - it was difficult to get access/grip on those nails! Then, I used the STANLEY 55-515 Wonder Bar Pry Bar. Wow! I soon hit upon a technique which extracted the nails like one would remove push pins by hand!

I extracted nails out of 8 joist hangers. I then cut small shims out of Pandya's material - the Mitre Saw was great here as well.

When Uncle and Reddy came to help out, we leveled the joists using the shims, double checked with a 4' level, and hammered the side nails back in place.

Whew - that was easier than I expected, and a big relief!

Thursday, November 10, 2005

More Decking Boards

Ajmal and I went to Pandya's and hauled more boards. We returned one board and fitted in 20 into the ol' minivan. We brought the cargo back and unloaded it in the garage. I dropped off Ajmal, reconfigured the minivan, and went and hauled 22 more. I now had 16-1+20+22 = 57 in all. Just 13 more required for the decking, and 2 more for stairs!

Sunday, November 06, 2005

Joist Check: Not Good!

Bummer! Ajmal & Uncle came over to help out with the decking. But when we laid the decking boards on the joists, the shape of the deck was just not right: (a) the joists were not all at the same level, and (b) the board material was so flexible that it was being shaped by the joists.

We brainstormed some remedial measures:
  1. Remove side nails from hangers, and elevate some of the joists using shims
  2. Plane some of the joists using a Block Plane
  3. Place shims on top of some joists, and then screw the decking on
#1 was deemed the best solution since #2 and #3 would involve too much labor/precision. But will the side nails come out easily? I was left to ponder this...

Joist Spacers


I measured the joist spacing at the ledger board end, and cut pieces from joist stock for the joist spacers. Dave's Mitre Saw was absolutely invaluable, giving me precision to 1/16"!


I then strung up a line at the center of the joist span (about 6' 6" from the ledger board, and installed the joist spacers with 10d 3" nails, alternately staggering them on either side of the ceter line.

Friday, November 04, 2005

Decking Material


Today, I went over to Pandya's and transported 16 pieces of redwood color decking boards (2"x6"x10').

Need 56 more boards...!

Thursday, November 03, 2005

Joists: Oct 30 - Nov 3, 2005

Oct 30: Gorgeous and extremely fruitful day! In the morning, I drilled 3/8" holes and installed carriage bolts attaching the girder beams firmly to the posts. I also drilled 1/2" holes and installed carriage bolts attaching the posts to the post anchors. Ajmal & Uncle came over. Uncle marked approximate joist positions on the girders. I sawed the posts flush with the girders. We then placed one end of each joist on the ledger board and rested the opposite side on the girder beams.

Oct 31: Another gorgeous day - we were lucking out this Fall! I hammered in all the side nails on each joist on the ledger board end.

Nov 1: I took the day off. Manisha is off on Tuesdays. Together, we nailed the joists to the girder beams using twist anchors. We also positioned the end joist, and screwed it to each joist. We did a lot of measuring to keep things square. It started raining just after we finished up. It was another memorable and fruitful day - the framing looked nearly complete!!

Nov 2: I started hammering framing braces where the joists met the end joist. I got half done.

Nov 3: I completed hammering in the framing braces where the joists met the end joist. The framing was complete. The Richland municipality building code inspector took a look and approved.

PHASE I (FRAMING) IS NOW COMPLETE!


Sunday, October 30, 2005

Girder: Oct 22-30, 2005

On Oct 22 , I cut some 4X4's to 3 to 4 ft pieces and installed them on the post anchors. I held them close to a vertical position (using Ajmal's post level), and drove in a couple of 16d nails through the post & post anchors. I was concerned that there was some play between one of the anchors and the concrete pier. There was also some play between the posts and the anchors.

On Oct 27, Reddy and I strengthened some of the piers by mixing and applying concrete. We also used a water level to mark the joist line on all the posts.

On Oct 29, Reddy called up in the morning and asked why I was not working on the deck. He then showed up and we spent a tremendously fruitful Saturday morning! We accomplished a ton of things such as:
  1. Braced the posts to a perfectly vertical position using stakes and 2x4 s
  2. Sawed two 4x4 pieces and attached them to the center post using lag screws
  3. Attached 4 (four) girder beams to the posts. We used C-Clamps to hold them in place, and then applied screws for a more permanent hold.


Friday, October 21, 2005

Posts, Ledger Board: Oct 15-21, 2005

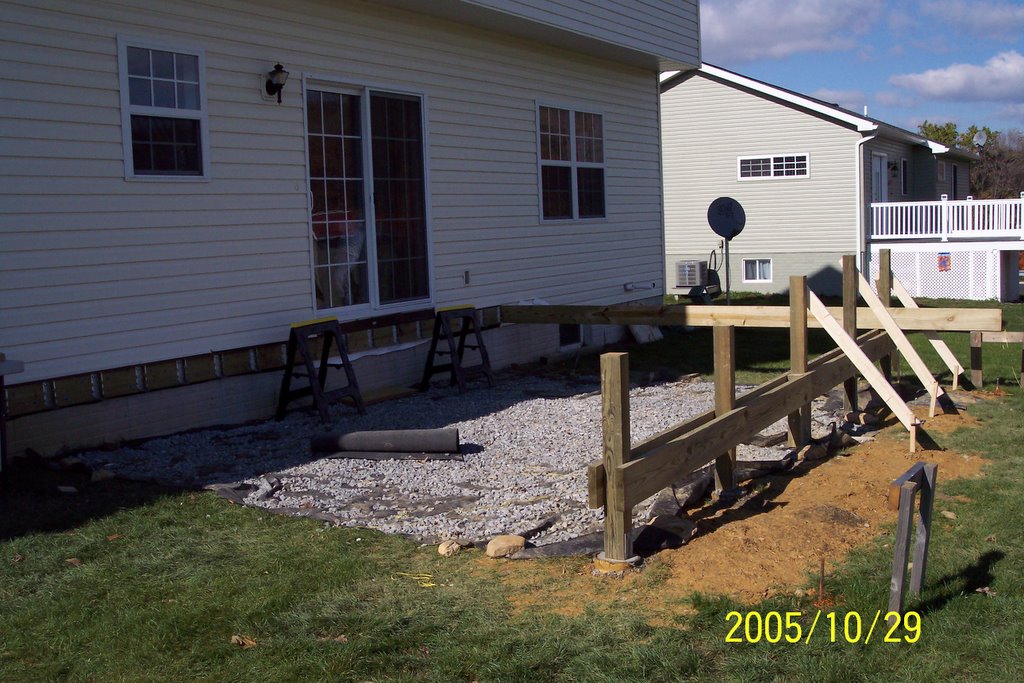
Oct 15: Memorable first day!

First Dave & I hauled some gravel and went to Lowe's to buy some tools/hardware.

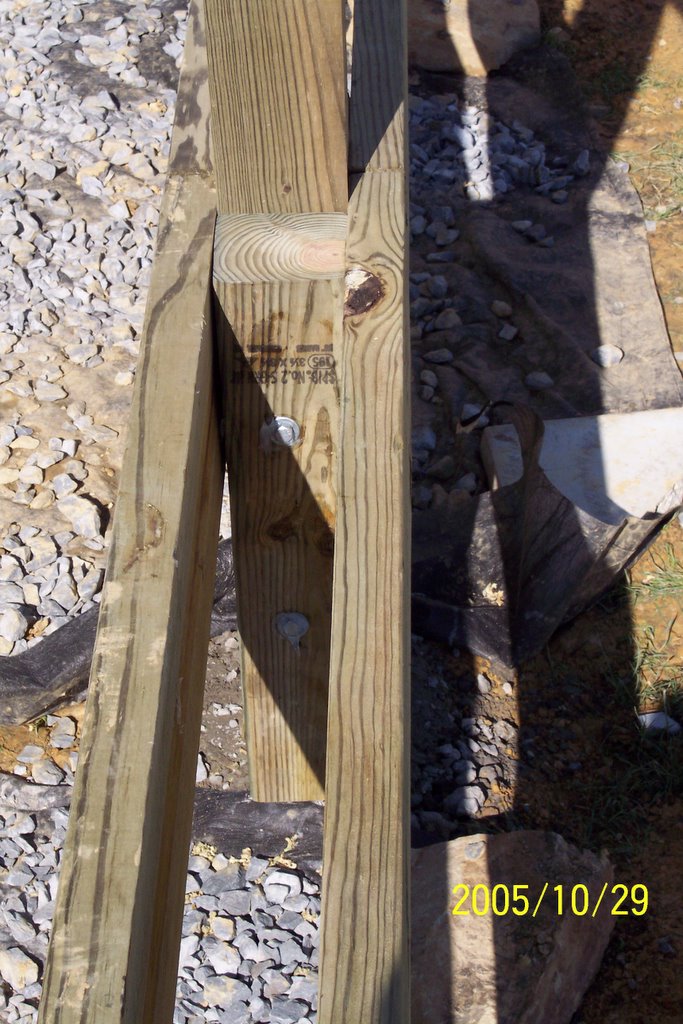
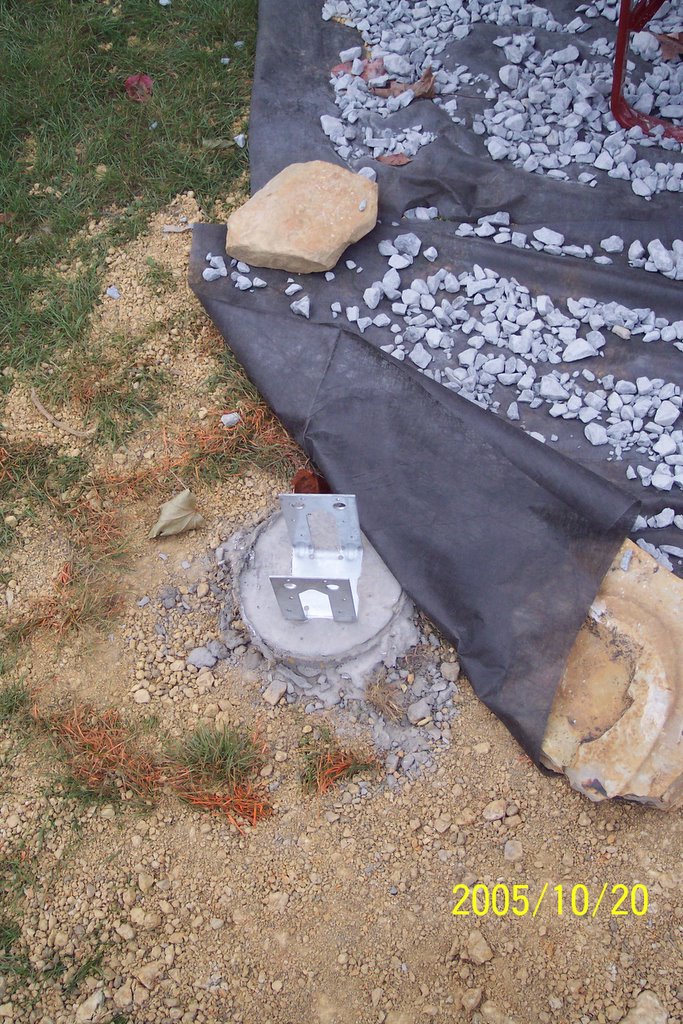
Fueled by some Indian food (cooked by Manisha) and assisted by some Labatt's, we (Reddy, Dave & I) broke ground! We marked the deck corners, dug a few holes, poured concrete and installed post anchors in the dark. The errors introduced by the beer apparently canceled the errors induced by the darkness.

Results:
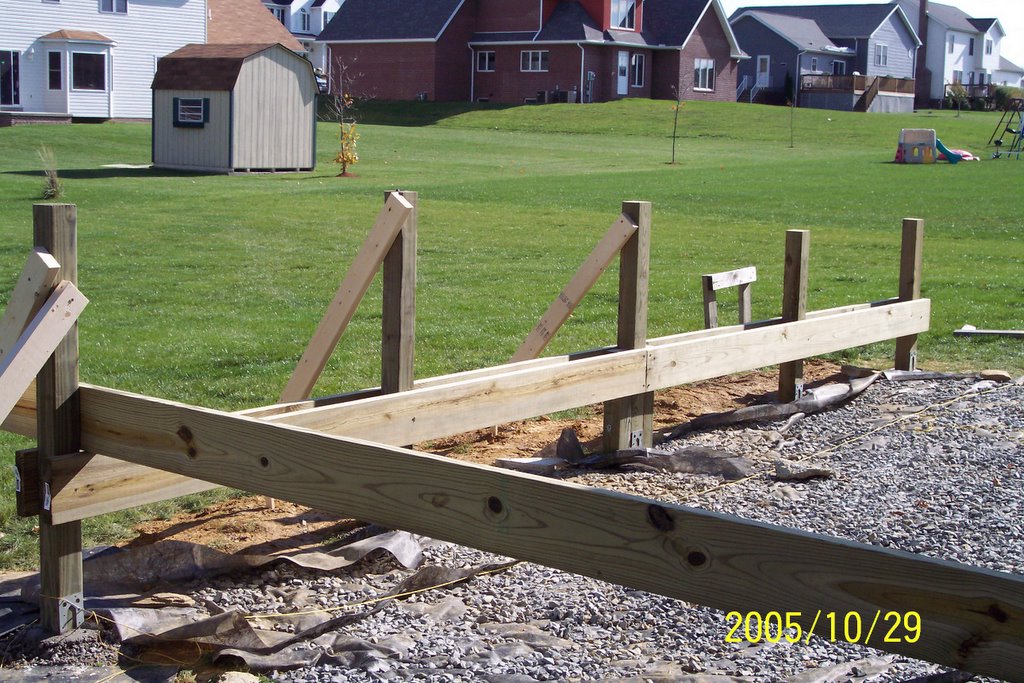
- Deck area marked off by weed block and gravel
- 5 x 3ft deep holes filled with concrete and topped by wet/pronged post anchors
- Muscle aches for the next 2 days!

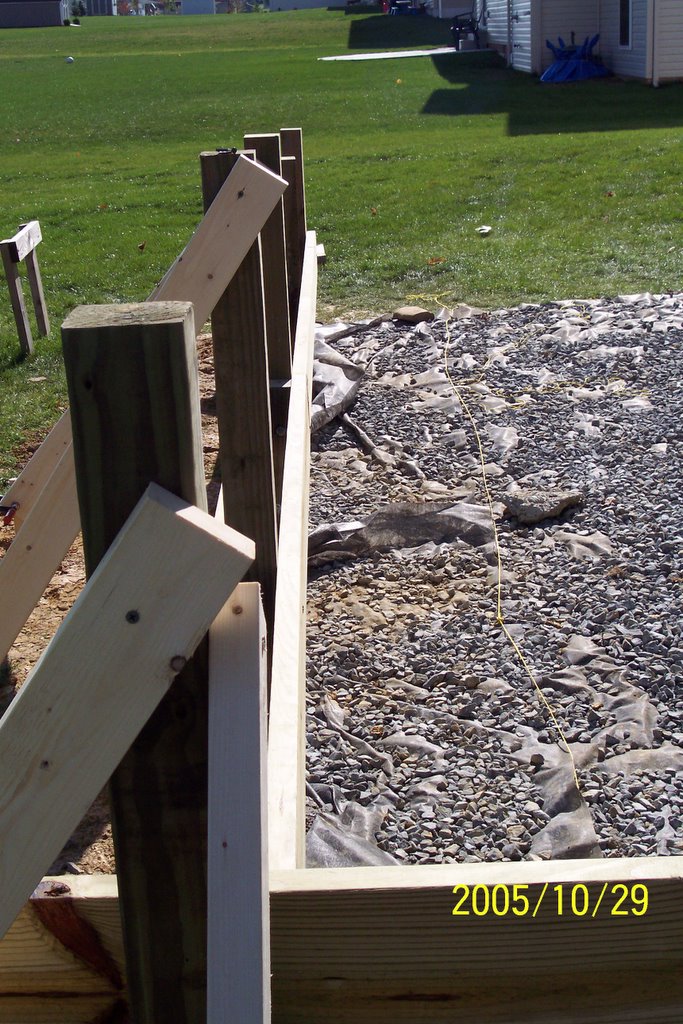
Follow-up (Oct 17-20, 2005):


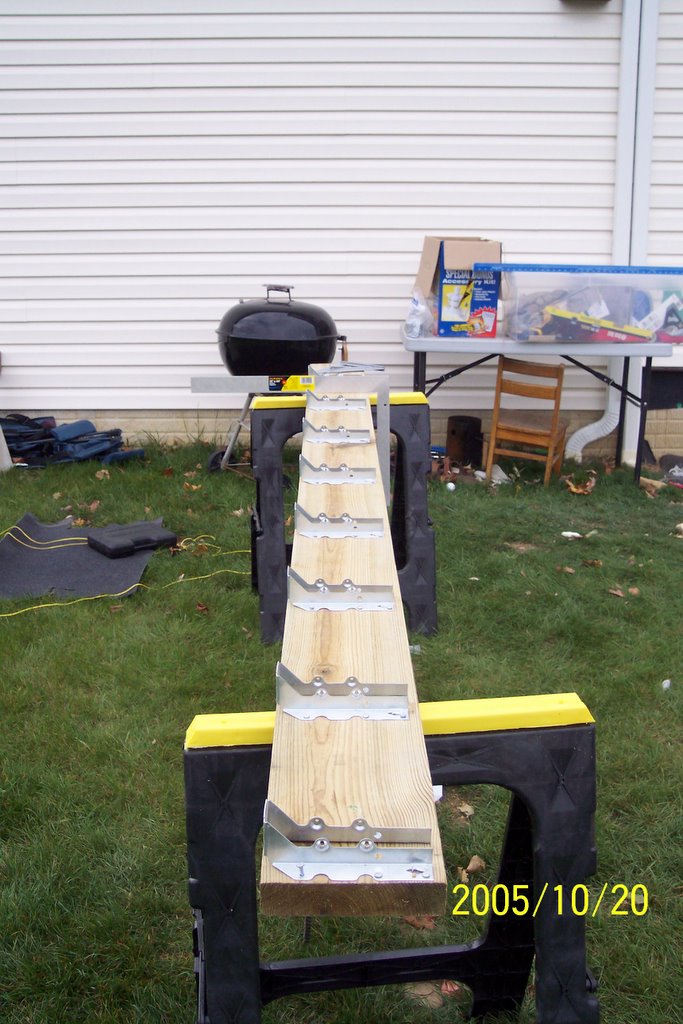
I unrolled more weed block and spread the gravel until the post line. I also prepped the ledger board and estimatedplanned the work to be done for the flashing & ledger board.

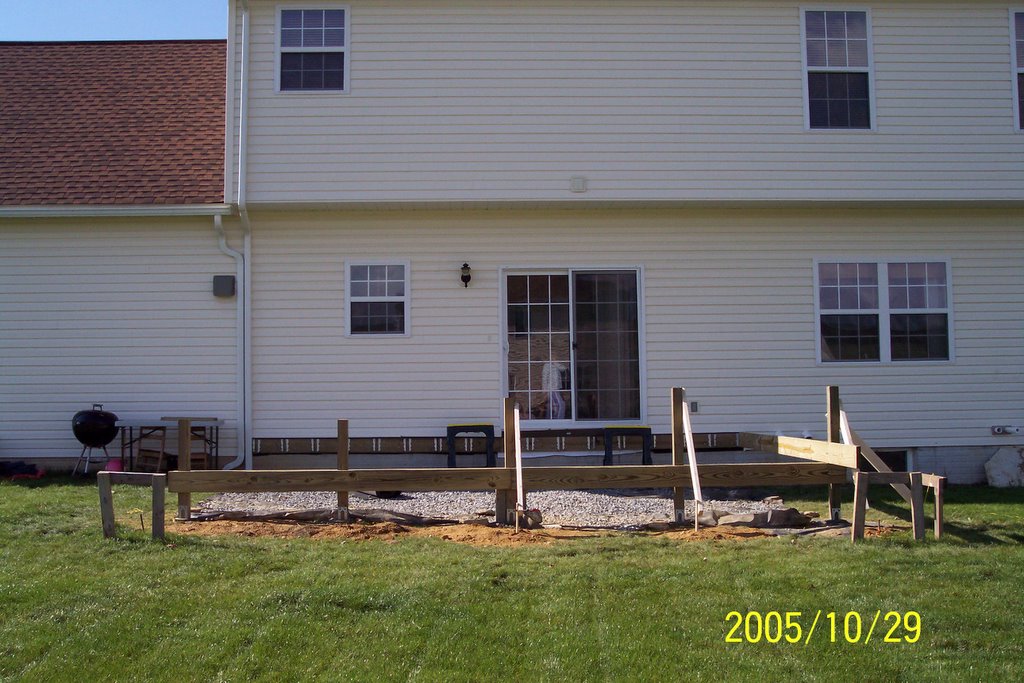
Follow-up (Oct 17-21, 2005):

With help and advice from Ajmal and Uncle (Munawar's dad), I prepped (more like ripped :-) the siding, installed vinyl/tar paper for water proofing, and installed the ledger board with lag screws (with caulking).

Friday, October 14, 2005

First Things First: Design


I planned to build a 16 ft x 20 ft deck. I drew it up using Microsoft Visio.