Saturday, November 19, 2005

Deck Flooring: Done! (Close to...)


On 11/18, Ajmal and I went to pandya's and hauled 13 more boards.

On 11/19, I trimmed and put them all in place except the 4 belonging to the last 2 rows. I need to put in my stair posts, so they will have to wait until next spring.

I then took a well earned break to watch Troy Smith do unspeakable things to the Wolverines like he did last year. Life is good!

PHASE 2 (DECK FLOORING) IS NOW COMPLETE!

Tuesday, November 15, 2005

Deck Flooring: 80%


Weather was looking good, so before we got the rain and snow as promised, I put in the rest of the boards that I had. Row count: 28 of 35.

I need 13 more boards! I will probably haul them on Nov 17, and finish up the decking over the weekend.

My daughter is really excited and she told me yesterday "Daddy, you do good deck work" :)


Sunday, November 13, 2005

Deck Flooring: 60%


More boards. Row count: 22 of 35. I now had a well-established process to do this. Some of the pieces had to be cut to size, so the going was slow despite the process :)

Saturday, November 12, 2005

Deck Flooring: 40%


I installed more deck boards. Row count = 14 of 35.

Friday, November 11, 2005

Deck Flooring: the first 25%

Uncle, Reddy and I figured out the dimensions of the boards we needed to cut for the deck floor. Pandya's material came in 10ft long pieces. It was more like 10' 2", but some needed to be trimmed to remove flashing, and other artefacts. I had planned on a staggered pattern comprised of:
  • Row 1: 10 ft + 10 ft
  • Row 2: 5ft + 10ft + 5 ft
Turned out the 5 ft pieces actually had to be more like 5' 1". As uncle and Reddy set about cutting them to size, I was placing them on the joists for a visual check.

Everything checked out. We then broke for lunch.

Fueled by Pizza, Reddy and I then started screwing the boards in place using a power drill/screwdriver ( a must have!). The boards did not require any pre-drilling since we were using 3" composite wood screws. We used simple paint sticks for controlling the spacing between the boards. We managed to put in about 6 rows. After Reddy left, I put in 3 more rows.

Decking was about 25% complete (9 of 35 rows)!

Remedial Measures


I started early on Veteran's Day, which was a holiday. I had decided to try to remove the side/angled nails from the joist hangers. I tried a couple of different tools - it was difficult to get access/grip on those nails! Then, I used the STANLEY 55-515 Wonder Bar Pry Bar. Wow! I soon hit upon a technique which extracted the nails like one would remove push pins by hand!

I extracted nails out of 8 joist hangers. I then cut small shims out of Pandya's material - the Mitre Saw was great here as well.

When Uncle and Reddy came to help out, we leveled the joists using the shims, double checked with a 4' level, and hammered the side nails back in place.

Whew - that was easier than I expected, and a big relief!

Thursday, November 10, 2005

More Decking Boards

Ajmal and I went to Pandya's and hauled more boards. We returned one board and fitted in 20 into the ol' minivan. We brought the cargo back and unloaded it in the garage. I dropped off Ajmal, reconfigured the minivan, and went and hauled 22 more. I now had 16-1+20+22 = 57 in all. Just 13 more required for the decking, and 2 more for stairs!

Sunday, November 06, 2005

Joist Check: Not Good!

Bummer! Ajmal & Uncle came over to help out with the decking. But when we laid the decking boards on the joists, the shape of the deck was just not right: (a) the joists were not all at the same level, and (b) the board material was so flexible that it was being shaped by the joists.

We brainstormed some remedial measures:
  1. Remove side nails from hangers, and elevate some of the joists using shims
  2. Plane some of the joists using a Block Plane
  3. Place shims on top of some joists, and then screw the decking on
#1 was deemed the best solution since #2 and #3 would involve too much labor/precision. But will the side nails come out easily? I was left to ponder this...

Joist Spacers


I measured the joist spacing at the ledger board end, and cut pieces from joist stock for the joist spacers. Dave's Mitre Saw was absolutely invaluable, giving me precision to 1/16"!


I then strung up a line at the center of the joist span (about 6' 6" from the ledger board, and installed the joist spacers with 10d 3" nails, alternately staggering them on either side of the ceter line.

Friday, November 04, 2005

Decking Material


Today, I went over to Pandya's and transported 16 pieces of redwood color decking boards (2"x6"x10').

Need 56 more boards...!

Thursday, November 03, 2005

Joists: Oct 30 - Nov 3, 2005

Oct 30: Gorgeous and extremely fruitful day! In the morning, I drilled 3/8" holes and installed carriage bolts attaching the girder beams firmly to the posts. I also drilled 1/2" holes and installed carriage bolts attaching the posts to the post anchors. Ajmal & Uncle came over. Uncle marked approximate joist positions on the girders. I sawed the posts flush with the girders. We then placed one end of each joist on the ledger board and rested the opposite side on the girder beams.

Oct 31: Another gorgeous day - we were lucking out this Fall! I hammered in all the side nails on each joist on the ledger board end.

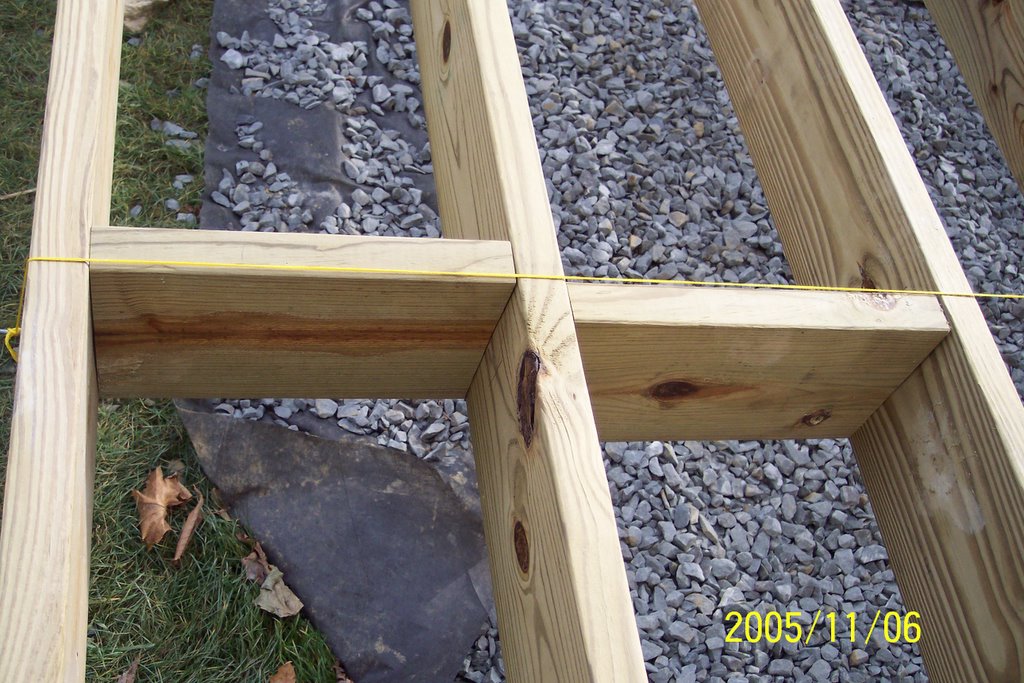
Nov 1: I took the day off. Manisha is off on Tuesdays. Together, we nailed the joists to the girder beams using twist anchors. We also positioned the end joist, and screwed it to each joist. We did a lot of measuring to keep things square. It started raining just after we finished up. It was another memorable and fruitful day - the framing looked nearly complete!!

Nov 2: I started hammering framing braces where the joists met the end joist. I got half done.

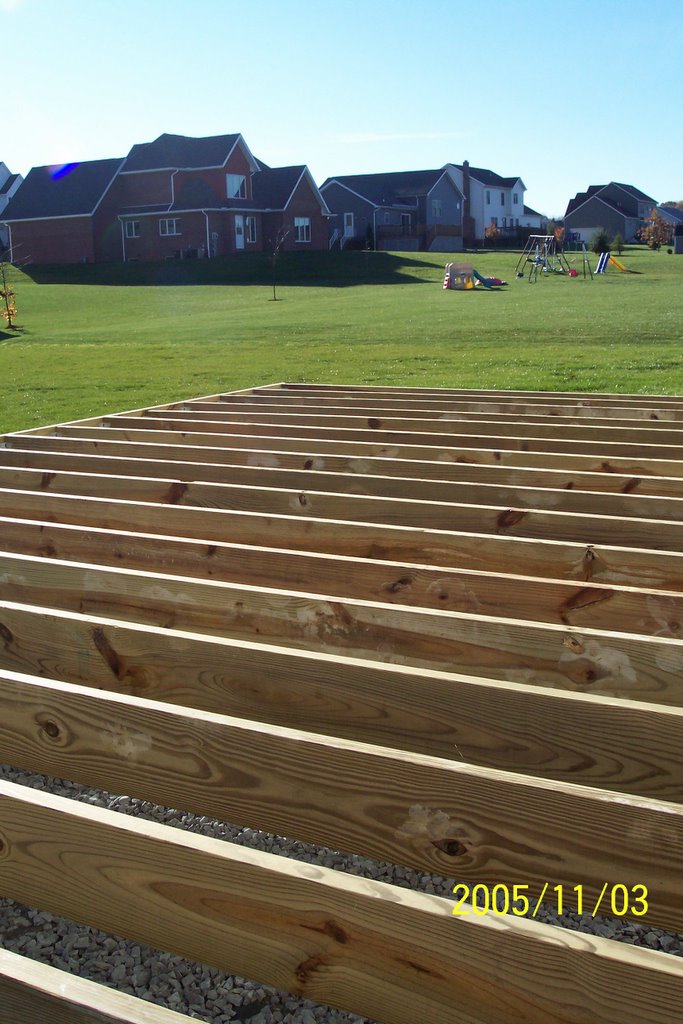
Nov 3: I completed hammering in the framing braces where the joists met the end joist. The framing was complete. The Richland municipality building code inspector took a look and approved.

PHASE I (FRAMING) IS NOW COMPLETE!